Free Hosting(VPS) in Microsoft Azure using Azure for students
This article is about creating a free VPS in Microsoft Azure without any credit card. You need to have a valid educational email address and need to verify to get Azure credit. We can use VPS for hosting desired web applications.

Microsoft Azure provides 100$ in credit for students for 1 year. It also provides other services for free such as SQL Database, Blob Storage, Managed Disks, etc. We can use these services to host a Django application for free. This method uses GUI(Graphical User Interface) however if you want to define configuration in a script and create VPS using terraform then check this article.
To host your application in Azure, the following services are needed.
- Subnet
- Public IP
- Network Security Group
- Virtual Machine
- Disk
- Blob Storage(Optional)
- SQL Database(Optional)
We must choose the configuration of these resources wisely. Otherwise, we may run out of our credit soon. First, we need to create a Virtual Linux Server(or Windows) and connect it with other required resources.
For this tutorial, we will use Ubuntu VPS but feel free to use another operating system as per your wish.
VPS
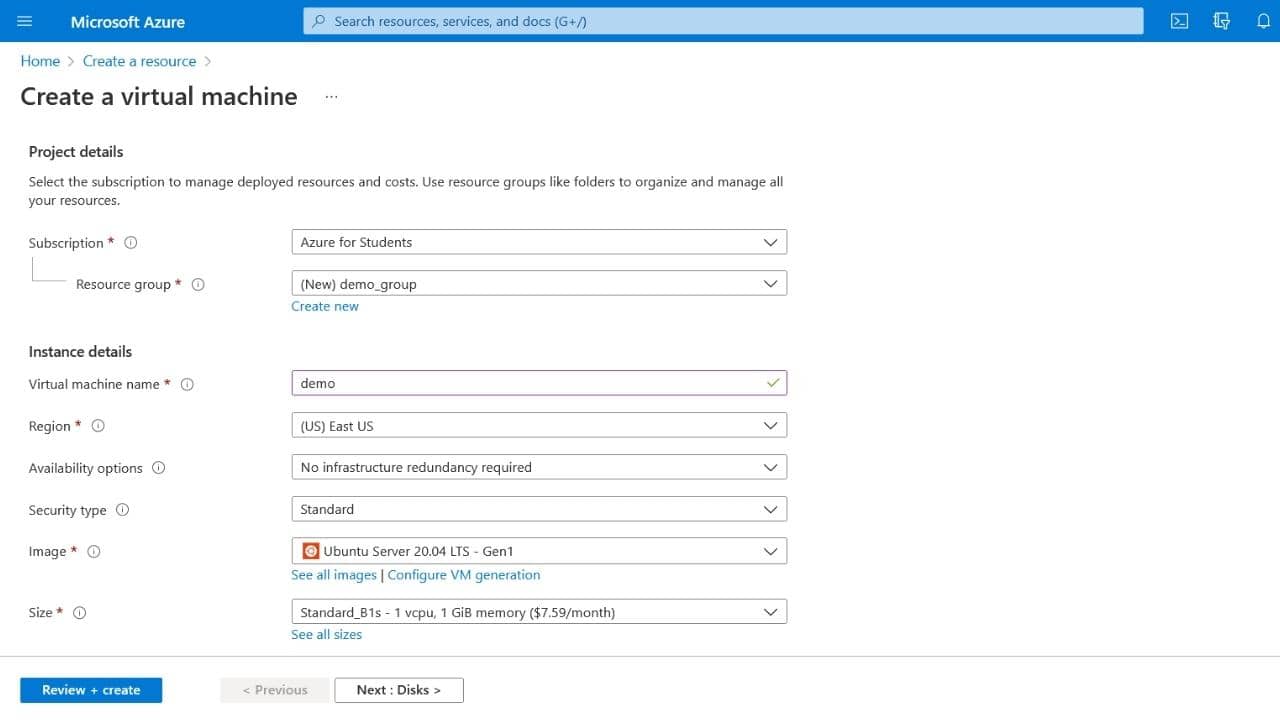
To create a VPS, click on Create a Resource in the Azure portal and Select Ubuntu Server 20.04 LTS. The selected subscription should be Azure for students. To create a new resource group, click on Create button below Resource Group. A resource group will group related resources for an application, divided into groups for production and non-production. Provide a suitable name and location for the virtual machine. You can change the operating system by selecting from the image.
We need to select a VM size under 100$ for 1 year. The recommended configurations are Standard_B1s and Standard_B1ls.
Provide a suitable username for the server and a name for the SSH key pair.
SSH
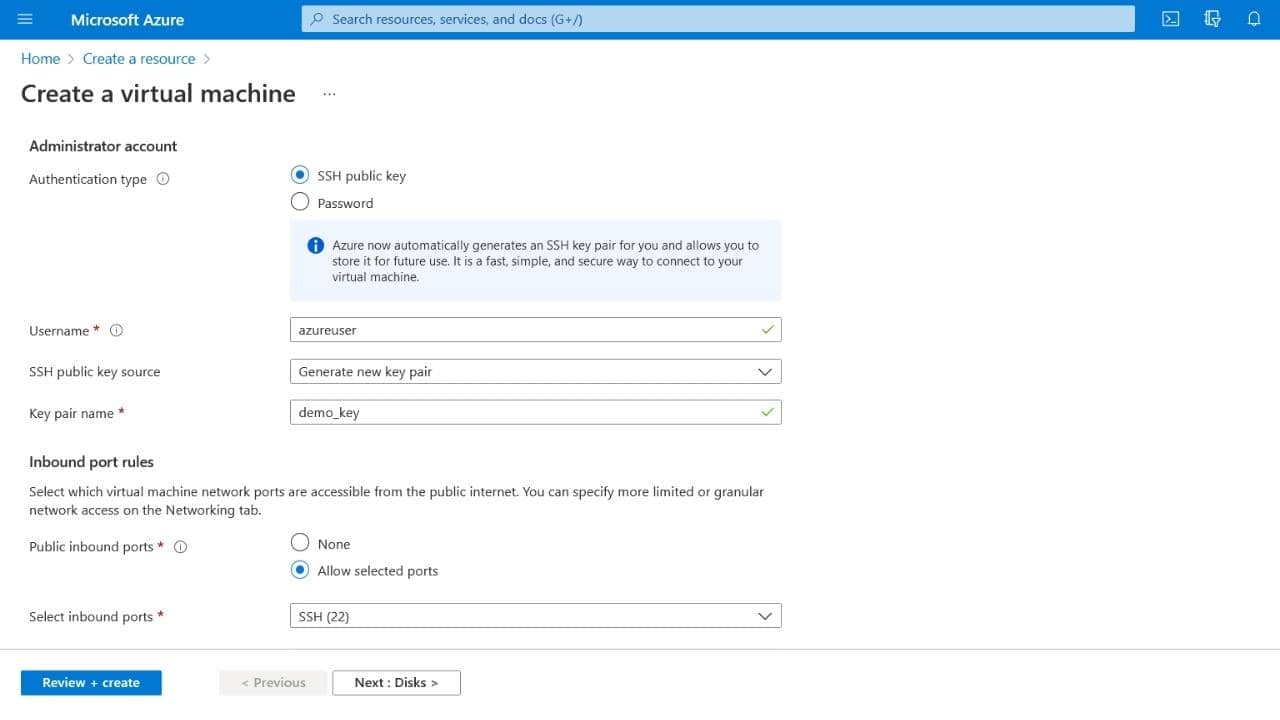
You can connect to your server through a password or SSH. SSH is a fast, simple, and secure way to connect to your virtual machine and is preferred to a password connection. To set up SSH for your machine, select the Authentication type as SSH public key in the Administrator account and provide a username and key pair name for the SSH public key.
In the Inbound port rules section, the inbound port should be 22.
After this, Azure will generate an SSH key pair. We should save this file securely because the loss of this file restricts access to the server, and Azure doesn't store this file.
Disks
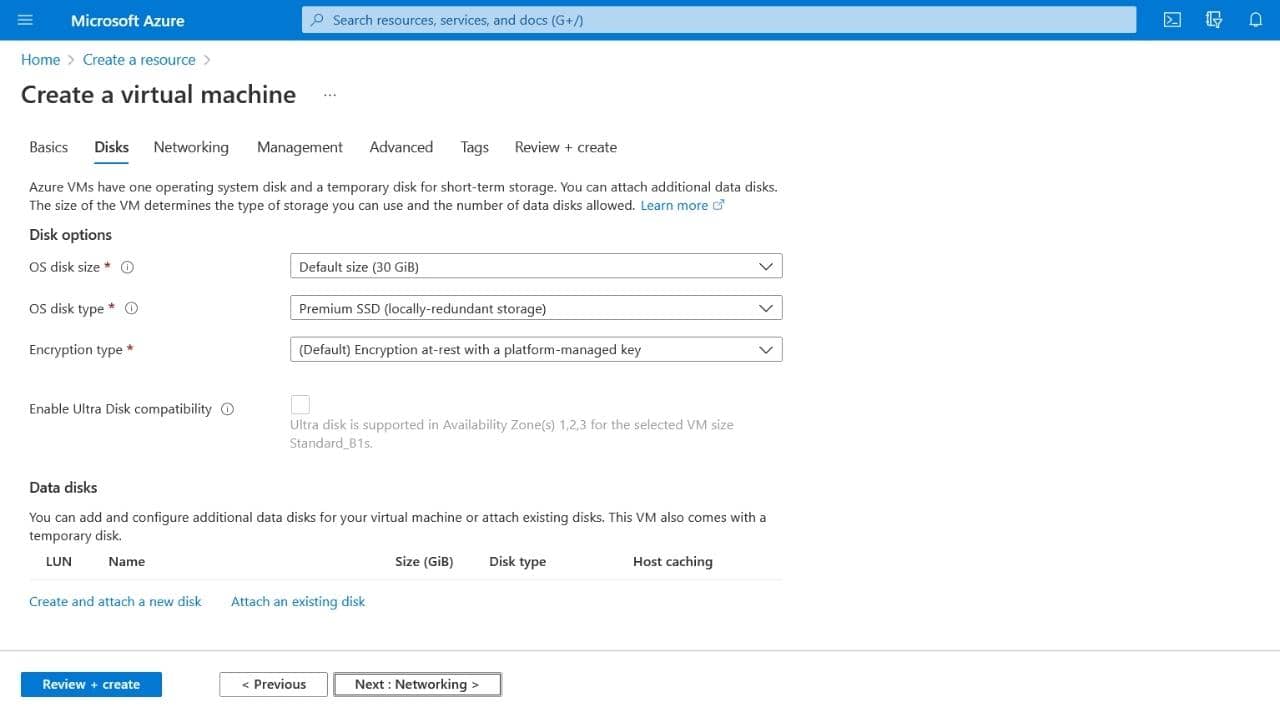
Azure provides 2 64 GB solid-state drives SSD storage for free to students.
Go to Disks, click on Create, attach a new disk, and go to Size. Select size up to 64 GB.
Networking
Go to Networking and use the default configuration for networking.

Tags
Tags are name/value pairs that enable you to categorize resources. Go to Tags and create key-value pairs for your server.

Finally, go to Review+Create and ensure that all the configurations selected for your server are correct. And finally, click on Create.
It may take a few minutes for your server to be ready. Go to Dashboard and click on your VPS. You can see the details of your server along with the IP address.
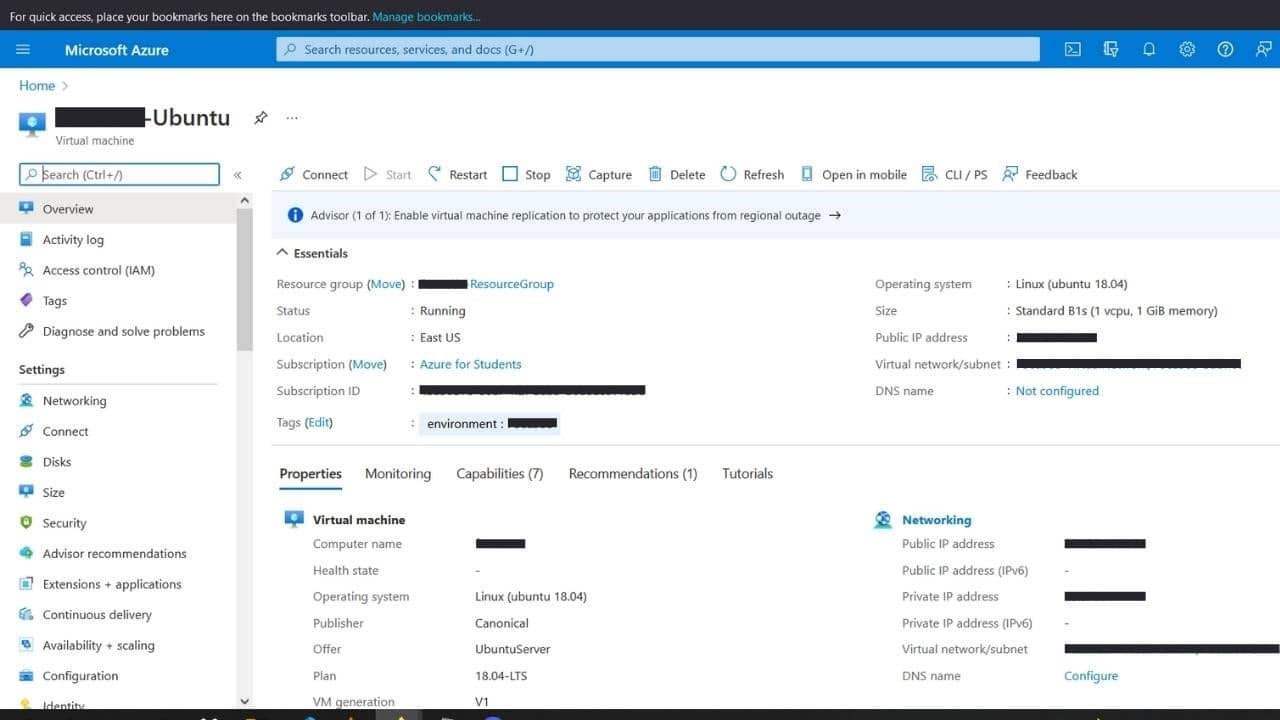 Microsoft Azure VPS Portal
To SSH into the server, we should change the permissions of the SSH file. Open a terminal in the folder where the SSH file is located and type
chmod 600 ssh_filenameAnd finally type
ssh -i SSH_file_name username@ip_addressTags
Comments
warning You need to Sign Up to Comment

